Tuesday, October 31, 2006
A Tale of Two Eggs
Now, you just might be wondering if there's something wrong with that egg on the left. Rest assured it's perfectly normal.
Perfectly normal for a duck egg. You can certainly see where the term duck egg blue evolved from.
I am always excited to see duck eggs - especially ones as fresh as these free range wonders.
What excites me is that they are a bakers dream. With these you can produce cakes to die for.
It's their differences that really set them apart and make them special. They are higher in fat, the yolks are a rich golden colour and the whites are extremely gelatinous. When used in baking you'll find the items will have an intense yellow colour and also be more sturdy and resilient. You'll also find that there's an increased richness to the taste - it's slightly decadent.
While duck eggs are perfect for use in pasta, custards and cakes, they are unsuitable for meringues and soufflés. This is due to the absence of globulin, a necessary protein in the formation of foam.
One other thing I should note is that duck egg shells are thicker than chicken eggs. Cracking them takes a little more effort and it's useful to use the blunt side of the knife to help break through the shell - a few raps to the shell should create a tidy crack.
If you've never tried duck eggs I can't help but urge you to seek them out - the proof of their quality is in the pudding, or in this case the sponge!
Sponge Cake
[Makes 2 x 20cm/8inch diameter cakes]
6 duck eggs
¾ cup caster sugar
1¼ cups plain flour
60 grams melted butter, cooled
Preheat the oven to 180°C/350°F.
Butter and flour two 20cm/8 inch shallow cake tins (about 5cm/2inch in height) - line the bases with baking paper cut to size - this will make removal easier.
Break the duck eggs into the bowl of a stand mixer - add the sugar and beat until thick and fluffy and tripled in volume. Since this is made using duck eggs, you'll notice the mixture won't be pale, it will retain a deep yellow colouring. The beating will take around 10 minutes.
While you are waiting, triple sift the flour. Also try to incorporate as much as air as possible while sifting, so sift from a good height above the bowl. Triple sifting is a fairly standard procedure when making sponge - the whole purpose in each step is to maximise the aeration.
When the eggs are ready it's time to add the flour - sift the flour over the bowl. Begin folding this through using a metal spoon and the figure eight cutting motion. When it's almost totally incorporated, drizzle in the cooled melted butter and continue to fold until just mixed.
Divide the mixture evenly into the two cake tins and bake for approximately 25 minutes or until golden and the cakes are still springy to the touch.
Cool slightly in the tins before turning out onto wire racks to cool.
To make this filled sponge:
I used Gippsland Organic Pure Cream (40% fat) and my Rhubarb, Apple & Vanilla Jam - naturally enough, you can fill this with your favourite cream and jam.
I've whipped the cream until firm - pure cream is my preference as it doesn't contain any other ingredients other than the jersey cream itself, there's no gums or thickening agents. It takes slightly longer to whip but you'll find that it actually has a better hold. Taste-wise, it can't be beat and if you've gone to the trouble to find the duck eggs, why take a short cut on the cream.
Tagged with Cake
Born with a pearl spoon in her mouth, Haalo's future was soon decided..
Monday, October 30, 2006
Food Destinations #3
Emily from Chocolate in Context is hosting this month's Food Destinations and has settled on the most appropriate theme of My Favourite Chocolate Shop!
Xocolatl is an Aztec word meaning bitter water and it's where we get our word for Chocolate - it's also the name of the chocolate shop I'll be featuring.
Head east from Melbourne to the rather gentile inner suburb of Canterbury and in particular well-known Mailing Road and amongst the antique market and lace stores you'll find the rather funky Xocolatl.
Besides being home to a large range of hand-made Belgium chocolates, they also offer a variety of hot chocolates. We particularly recommend the intensely flavoured orange chocolate - think of a warm, molten jaffa and you'll come close to how good this tastes. If you're after something a little more subtle then the Spanish chocolate with hints of cinnamon and vanilla is for you.
When it comes to chocolates - you'll be spoilt for choice with over 40 on offer at any one time. Belgium couverture is used and price wise, all chocolates are equal and are $1.50 each. Whether you buy one or 40 they are all hand packed in these simple white boxes.
For this post I'll take you through 6 of these chocolates.
Strawberry - under it's white chocolate heart, is a milk chocolate ganache speckled with strawberry pieces.
Hazelnut Praline - the top is a rather thick layer of white chocolate with a milk chocolate drizzle. Inside is a wonderfully morish hazelnut praline ensconced in a milk chocolate ganache.
Lemon Verbena - a dark chocolate ganache is subtlety flavoured with lemon verbena then encased in a dark chocolate shell.
Morello Cherry - a traditional combination of liqueur morello cherries and dark chocolate. A whole cherry lays inside the pyramid.
Summer Pudding - a blend of glacé fruits and white chocolate ganache is encased in the signature dark chocolate casing.
Basil and Champagne - probably the more unusual combination but the basil is a delicate note in the ganache and has quite a refreshing effect when combined in this chocolate.
The details:
Xocolatl
123 Mailing Road, Canterbury
Phone: 03 9836 3100
Open: Daily
Tagged with Food Destinations
Sunday, October 29, 2006
Weekend Herb Blogging #56
Fiber from 28 Cooks is hosting this edition of Weekend Herb Blogging.
With spring well in force and summer just around the corner a host of new season's produce is arriving. Today, I'll focus on the first of the new season's Garlic.
This is as close to the freshest garlic you'll get, besides growing it yourself. There's still a dampness to the bulb - an indication of it's just harvested status. The skin is firm, there's no sign of dryness or that parchment quality to the outer covering, so usual in older garlic.
At this stage there's quite a bit of heat to these bulbs, something that time will lessen. So it's important to keep this in mind when using in your recipes.
Garlic is quite a wonder-bulb containing a smorgasbord of phytochemicals and nutrients including calcium, folate, iron and zinc. It also contains Allicin, an antibiotic. Medicinally it's been used to guard against colds, lower cholesterol, to treat intestinal worms, fight off infections and even regulate blood sugar levels.
I must admit that even though my parents are Italian we aren't huge garlic eaters, preferring the more mellow influence of slow roasted garlic. However, to celebrate the essence of garlic I've decided to make a traditional dish from Piedmonte called Bagna Calda (or Bagna Caôda - it literally translates to Hot Bath).
This garlic and anchovy dip is used as an accompaniment for fresh raw vegetables and bread. The dip is usually served in a terracotta bowl, kept warm over a small candle or spirit burner. A mini fondue set would make an ideal vessel.
Bagna Calda
4 tablespoons olive oil
30 grams anchovy fillets, diced
30 grams garlic cloves, crushed
30 grams butter, cubed
In a small pan add the anchovy and oil and over a low flame, heat gently. Stir, and once the anchovy begins to dissolve add the crushed garlic. Continue cooking in a very gentle simmer, for about 15 minutes - you must not allow the garlic to brown - you just want it to soften and the mixture to become creamy.
Add the cubed butter and swirl around until dissolved.
Pour into a small bowl and set over a burner.
If you would prefer a less intense garlic flavour then this trick is for you - simmer the garlic in a little milk until it's almost soft. Drain then proceed with the recipe.
Tagged with Weekend Herb Blogging : WHB
Labels:
Weekend Herb Blogging
Born with a pearl spoon in her mouth, Haalo's future was soon decided..
Friday, October 27, 2006
Wattle Seed Madeleines
Jeanne from Cooksister has chosen the utterly enchanting theme of little bites of delight for this edition of Sugar High Friday.
After much contemplation I finally settled on the classic Madeleine - but gave it an Australian twist with the addition of ground wattleseeds. I have used wattle seeds previously but to recap they have subtle coffee flavour with hints of hazelnut and chocolate. Since we are dealing with a small item, this is an ideal way to impart a lot of flavour by the addition of one simple ingredient.
The wattle seeds themselves give a slight speckled appearance to the Madeleines and turn this delicate treat into something with a little more complexity.
Combine the wattleseeds with the cooled melted butter and set to one side.
Place the eggs, sugars and vanilla extract into a food processor and process until combined. Add sifted flour and baking powder - process briefly to combine. With motor running add the cooled butter/wattleseed.
Pour this into a bowl and cover - place in the fridge to rest at least one hour or overnight.
Preheat the oven to 180°C/350°F.
Butter and flour the Madeleine moulds.
Spoon batter to two-thirds fill each mould and bake 8-10 minutes or until golden and cooked through.
Let them cool slightly in the tray before dislodging them.
Allow to cool completely on a wire rack, pattern side up.
Dust with icing sugar before serving.
Just for fun, I've used this mix to form two other shapes - a small barquette and a small pyramid - each easily consumed in a bite or two.
This recipe is based on these Honey Madeleines.
After much contemplation I finally settled on the classic Madeleine - but gave it an Australian twist with the addition of ground wattleseeds. I have used wattle seeds previously but to recap they have subtle coffee flavour with hints of hazelnut and chocolate. Since we are dealing with a small item, this is an ideal way to impart a lot of flavour by the addition of one simple ingredient.
The wattle seeds themselves give a slight speckled appearance to the Madeleines and turn this delicate treat into something with a little more complexity.
Wattle Seed Madeleines
[Makes about 60 mini madeleines]
90 grams butter, melted and cooled
1 teaspoon ground wattleseeds
2 eggs
75 grams caster sugar
20 grams soft brown sugar
1 teaspoon vanilla extract
90 grams plain flour, sifted
1 teaspoon baking powder,
icing sugar, to dust
Place the eggs, sugars and vanilla extract into a food processor and process until combined. Add sifted flour and baking powder - process briefly to combine. With motor running add the cooled butter/wattleseed.
Pour this into a bowl and cover - place in the fridge to rest at least one hour or overnight.
Preheat the oven to 180°C/350°F.
Butter and flour the Madeleine moulds.
Spoon batter to two-thirds fill each mould and bake 8-10 minutes or until golden and cooked through.
Let them cool slightly in the tray before dislodging them.
Allow to cool completely on a wire rack, pattern side up.
Dust with icing sugar before serving.
Just for fun, I've used this mix to form two other shapes - a small barquette and a small pyramid - each easily consumed in a bite or two.
This recipe is based on these Honey Madeleines.
Wednesday, October 25, 2006
Honeycomb Cookies
So you've made a large of batch of Honeycomb and while chomping on it isn't a problem, it would be nice to do something else with it.
Why not add some of it to a simple butter cookie dough and create some Honeycomb Cookies?
Honeycomb Cookies
[Makes 36]
125 grams softened butter
125 grams caster sugar
2 eggs, lightly whisked
250 grams plain flour, sifted
½ teaspoon baking powder
50 grams honeycomb, roughly crushed
Place the softened butter and sugar into the bowl of a mixer and beat until light and fluffy.
Add the whisked eggs, a third at a time, making sure they are absorbed before adding the next amount.
Add the sifted flour and baking powder and beat on a low speed until just combined.
Tip in the crushed honeycomb and beat for about 10 seconds.
Divide the dough into two and spread each half into the centre of a large sheet of baking paper. Use the paper to help form the dough into a sausage shape. When it has an even shape then roll up to form a tight sausage - twist the ends of the paper to ensure a snug fit. Place this in the fridge to firm overnight.
You can if you like skip this step and just roll tablespoons of the dough into balls. Flatten the tops slightly to get an even shape. Cook as per the sliced cookies.
Preheat the oven to 180°C/350°F.
Unwrap one sausage at a time - keep the other in the fridge until you are ready to use it.
Slice evenly, giving the roll a quarter twist after each cut to help maintain it's shape.
Place the slices on baking paper lined sheets, leaving a gap for the cookies to spread.
Bake for about 10 minutes or until the cookies are golden.
Let them sit on the tray for 5 minutes before placing on wire racks to cool.
Tagged with Cookies
Born with a pearl spoon in her mouth, Haalo's future was soon decided..
Tuesday, October 24, 2006
Cheese: Holy Goat
Holy Goat was the subject of my first cheese post so I thought it might be time to return and highlight another cheese from their range - the intriguingly named Pandora. You'll find upon opening this Pandora, that only good things lie inside.
Cheese: Holy Goat Ripe Pandora
Location: Sutton Grange Organic Farm, Victoria
As mentioned previously, Holy Goat is located at Sutton Grange, in central Victoria around Bendigo, at the foothills of Mount Alexander. It's an organic farm and the milk is obtained solely from their own goat herd which is a cross of British Alpine and Swiss Saanen goats. The cheese is made using traditional farmhouse techniques and based on French soft curd styles.
Once you pick up the packet you'll immediately notice quite a bit of give - an almost jelly like sensation. It's very similar in feel to the Udder Delights Goat Camembert.
Once removed from it's silver wrapper, it looks quite normal - but looks in this case are deceiving.
There is only one way to eat this cheese. Whatever you do - don't approach it like a regular cheese. To get inside, you must cut out a lid - simply run the knife around the top edge to reveal the contents.
You do not eat the rind - it's merely the vessel that contains the gloriously viscous cheese that you spoon out and savour.
Creamy, without any of those bitter goat elements, rich without being cloying, it's a cheese you can enjoy without any feelings of bloating. You just might find yourself scraping the sides to ensure you've garnered every morsel.
Tagged with Cheese
Sunday, October 22, 2006
Weekend Herb Blogging #55
Pat from the wonderfully named Up a Creek without a PatL is hosting this edition of Weekend Herb Blogging.
This week I've decided to use a very common herb - Mint.
Of the many varieties of mint, the one pictured is the Crinkly-leaf Spearmint which has that typical, heady mint scent. It's most commonly used in mint sauce, mint jelly and mint julep. It's also often matched to fresh green peas.
Mint is said to aid in digestion so I thought I'd utilise this property in the recipe. More suited for the ever-approaching summer, the refreshing tang of this mint sorbet will be sure to please on those warm evenings.
Mint Sorbet
(Serves 4)
½ cup water
1 cup caster sugar
½ cup lemon juice
¼ cup fresh mint leaves, shredded
Place the water and caster sugar in a saucepan and gently heat until sugar is dissolved. Simmer for 5 minutes before adding lemon juice and shredded mint leaves.
Stir to amalgamate and then remove from heat. Let this sit for 5 minutes before pouring into a shallow plastic container and place in the freezer.
After 4 hours, remove from freezer and run a fork through the icy mixture. Cover and return to the freezer.
Let this sit overnight and then it's ready to use.
When you want to serve, scrape the mixture into a blender and blend until creamy and smooth. Spoon out into glasses and serve immediately.
Tagged with Weekend Herb Blogging
Labels:
Weekend Herb Blogging
Born with a pearl spoon in her mouth, Haalo's future was soon decided..
Thursday, October 19, 2006
Honeycomb
It's approaching that time of year when your thoughts turn to making confections - be it for Halloween or Christmas or just to satisfy those sweet cravings.
One of the simplest yet most fascinating is Honeycomb.
It's highly aerated appearance is courtesy of the rather explosive reaction of bi-carb as it hits the molten sugars. The first time you make honeycomb it comes as quite a surprise - not in the reaction but in how great the reaction. The recipes will always warn you of the rise they just don't emphasise how much.
So I'm making sure from the start that you all realise that this stuff will bulk up - that the tray in which you set it needs to be high sided and large enough to ensure that it doesn't go bubbling out over the edges.
Honeycomb
(from Australian Womens Weekly)
1½ cups caster sugar
1/3 cup liquid glucose
2 tablespoons honey
¼ cup water
2 teaspoons bicarbonate of soda, sifted
In a high-sided large saucepan add the sugar, glucose, honey and water and stir over a gently heat until sugar has dissolved.
Continue to cook until the mixture turns a golden brown colour - this should take about 15 minutes.
While the sugars are cooking prepare your tray.
I line my tray (20x30cm or 8x12 inch and a good 2-3 inches in depth) with double thickness aluminium foil and extend it generously over the tray edges. Put this tray on a larger cookie sheet as a protection measure to catch any over-runs should the tray not be high enough.
Make sure the bi-carb is well sifted and when the sugar is ready, place this into the saucepan. Stir quickly to combine, you'll immediately notice the mixture become a lot lightly in colour and start to rise - it's texture will change to something resembling spun sugar. Keep stirring and when the mixture is approaching the top of the saucepan begin pouring it out onto the tray - the reaction will continue in the tray where it will keep rising. There's no need to smooth the mix out - it's best that you just leave it.
Let it set in the pan for about an hour - it will drop down somewhat as it cools.
Once cooled you can cut it into rough shapes and eat as it is.
Or if you like you can dunk the pieces into chocolate - a bit reminiscent of a crunchie or violet crumble bar.
Tagged with Sweet Food
Born with a pearl spoon in her mouth, Haalo's future was soon decided..
Monday, October 16, 2006
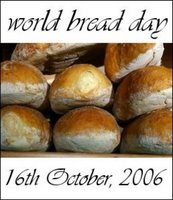
World Bread Day
It's finally here - World Bread Day!
Zorra from Kochtopf is hosting a wonderful event to celebrate World Bread Day and as a reminder, the intention was to either bake or showcase your favourite bread.
In the last few weeks to get into the swing of things I went baking mad and produced the following breads:
Burghal Bread - a wonderfully moist wholemeal bread due to the inclusion of soaked burghal, the crust a visual delight in it's coating of sesame seeds.
Seeded Orange Soda Bread - traditional soda bread gets a twist. The rise is a product of a reaction between baking soda and buttermilk - orange rind and a combination of poppy, sesame and pumpkin seeds give it a tangy crunch.
Piadina - a tradition northern Italian unleavened bread that's cooked on the grill.
Finally, for World Bread Day itself I've gone back to the beginning to make one of the oldest types of breads. A traditional recipe from Liguria, it uses at it's most basic version, chickpea flour, salt and water. This version I've added a spike of flavour in the form of finely chopped fresh rosemary.
Farinata
[Makes 1]
100 grams chickpea flour
1 cup warm water
pinch of salt
1 teaspoon finely chopped fresh rosemary
2 teaspoons olive oil
Sift the flour and salt into a bowl, add the water and rosemary and whisk until combined.
Set this aside for an hour.
Pour the extra virgin olive oil into a non-stick baking dish (20cm/8inch), spread it well before adding the rested mixture. The oil helps to enrich the bread.
Cook in a preheated 200°C/400°F oven until golden and crisp on the top.
Turn out onto a board - the underside will be firm but moist. Flip it over onto a wire rack to cool for a few minutes before returning it to a serving plate.
Slice and eat while still hot.
Tagged with World Bread Day
Mixology Monday VIII
Meeta from What's for Lunch Honey? is hosting this edition of Mixology Monday and choose the lively theme of Exotic Drinks.
When I think exotic, pictures of palm trees on deserted little islands come to mind and lazily sipping on cocktails complete with oversized garnishes.
Something a little like this.
Frozen Pina Colada
[Makes 1]
130 grams pineapple, peeled and chopped
60 mls coconut cream
60 mls white rum
2 teaspoons sugar syrup
1 cup crushed ice
Blend all ingredients until a thick puree forms. Spoon into a chilled glass, garnish with a dried pineapple slice and serve immediately.
Tagged with Mixology Monday
Sunday, October 15, 2006
Hay Hay! It's Donna Day! #6
JenJen from Milk and Cookies is the host of this month's Hay Hay! It's Donna Day! and she has asked us to go flat out for Fritters.
Simple is the by-line for Donna so I'll be making one of the simplest fritters there is - better yet these feather light parcels of fried goodness are sweet!
Adding an Italian spin on the humble fritter, I've come up with Frittelle di Ricotta or Ricotta Fritters. Lightly studded with Marsala soaked currants, you might find it difficult to stop at one. Like the Borg, resistance is useless!
Frittelle di Ricotta/Ricotta Fritters
[Makes enough to share but only if you must]
200 grams ricotta (you must use the real stuff)
2 tablespoons icing sugar, sifted
1 egg, lightly beaten
2 tablespoons plain flour, sifted
20 grams currants
1 tablespoons Marsala or a liqueur of your choice
vegetable oil, for frying
cinnamon caster sugar, for rolling
In a small bowl, soak the currants in the marsala until the liquid has been absorbed. You can do this overnight if you like.
Pass the ricotta through a metal mesh sieve - this helps to lighten the mixture.
Stir through the sifted icing sugar.
Continue stirring as you add the egg making sure it's incorporated before adding the flour.
Sift the flour, stir to amalgamate before finally adding the currants and any juices that remain in the bowl.
Use a small saucepan and add enough oil to a depth of 7cm/3in.
Heat until the oil reaches about 150°C/300°F on a thermometer.
Drop tablespoons of the mixture into the oil - don't crowd the pan as this will drop the oil temperature. At most, do three at a time.
Flip the fritters over to brown both sides evenly.
Remove onto paper towels to drain before tossing into caster sugar.
These are best eaten warm when the insides are soft and squishy.
Tagged with Hay Hay It's Donna Day : HHDD
Labels:
Hay Hay It's Donna Day
Born with a pearl spoon in her mouth, Haalo's future was soon decided..
Saturday, October 14, 2006
Weekend Herb Blogging #54
Sher from What Did You Eat? is hosting this edition of Weekend Herb Blogging. The subject of this post will be a pretty posy of pungent oregano courtesy of the local farmers' market.
It was remiss of me not to feature this most Mediterranean of herbs but I suppose it's usually thought of as a dried herb when using it in an Italian kitchen. My mother would buy the dried stalks of oregano from the local deli - it's aroma was utterly intoxicating. I was always amazed how little was actually needed to impart those heady scents.
Oregano belongs to the mint family and it is actually a wild form of marjoram. Oregano is noted for it's heart-shaped, dark green leaves. It's high in antioxidants and has anti-microbial qualities that sees it offer resistance against pathogens such as listeria.
I'll be using oregano in a very simple sauce called Salmoriglio that is a perfect match for grilled fish, chicken and lamb. A traditional match would be grilled swordfish.
Use the quantities listed as a guide as each persons taste is different. Always taste as you are making it and adjust accordingly. If you find the oregano too overwhelming, then try using a mix of half oregano and half parsley. The quantity listed won't make a huge batch - it's so easy that you really can make this to order - there's no point having it hang around for a week losing all it's flavour.
Use a mortar and pestle for the best result - you can of course use a processor.
Place the oregano leaves and salt into the mortar and using the abrasive qualities of the salt, crush the oregano until it forms a paste like substance. Add the lemon juice and continue using the pestle to incorporate. You should have a smoothish paste by this stage.
Add the oil, one tablespoon at a time, stirring it through with the pestle.
Taste and adjust seasonings - finish with a grinding of pepper.
To use, once the meat is cooked, just paint the surface with a little of the Salmoriglio before serving.
It was remiss of me not to feature this most Mediterranean of herbs but I suppose it's usually thought of as a dried herb when using it in an Italian kitchen. My mother would buy the dried stalks of oregano from the local deli - it's aroma was utterly intoxicating. I was always amazed how little was actually needed to impart those heady scents.
Oregano belongs to the mint family and it is actually a wild form of marjoram. Oregano is noted for it's heart-shaped, dark green leaves. It's high in antioxidants and has anti-microbial qualities that sees it offer resistance against pathogens such as listeria.
I'll be using oregano in a very simple sauce called Salmoriglio that is a perfect match for grilled fish, chicken and lamb. A traditional match would be grilled swordfish.
Use the quantities listed as a guide as each persons taste is different. Always taste as you are making it and adjust accordingly. If you find the oregano too overwhelming, then try using a mix of half oregano and half parsley. The quantity listed won't make a huge batch - it's so easy that you really can make this to order - there's no point having it hang around for a week losing all it's flavour.
Salmoriglio
5 stalks fresh oregano, leaves stripped (about 10 grams), washed and dried
½ teaspoon salt
2 teaspoons lemon juice
3 tablespoons extra virgin olive oil
freshly ground pepper
Use a mortar and pestle for the best result - you can of course use a processor.
Place the oregano leaves and salt into the mortar and using the abrasive qualities of the salt, crush the oregano until it forms a paste like substance. Add the lemon juice and continue using the pestle to incorporate. You should have a smoothish paste by this stage.
Add the oil, one tablespoon at a time, stirring it through with the pestle.
Taste and adjust seasonings - finish with a grinding of pepper.
To use, once the meat is cooked, just paint the surface with a little of the Salmoriglio before serving.
Labels:
Weekend Herb Blogging
Born with a pearl spoon in her mouth, Haalo's future was soon decided..
Friday, October 13, 2006
Double Cream - Doubly Delicious
A few weeks ago I posted about Elgaar Farm Club Cheddar and I thought I'd revisit them to focus on another of their products - double cream.
The first question you might be asking is What is double Cream? Well, the answer is not for the fat phobics so you might want to look away for a while. Double cream contains more than 48% butterfat, in the case of this cream it runs in close to 52%. Butterfat is extracted from the milk using a centrifugal process - the longer this process the thicker and richer the cream.
Opening the jar, you'll immediately notice the difference. The deep yellow colour and almost buttery appearance. This cream doesn't need whipping, it should be used as is - in fact if you whipped it a little too much you would end up with butter. Tastewise, it's almost like ice-cream without being frozen.
It has a marvellous scoopable quality, thick honey like characters that make it slightly gelatinous. It truly is something that should be savoured as is with the minimum amount of fuss.
So thinking about how best to show this double cream I decided on something very simple, clean flavours where the quality of the cream will be able to shine through. What else but Strawberry Shortcakes!
Strawberry Shortcakes
[Makes 10]
Shortcakes:
200 grams plain flour
100 grams rice flour
2 teaspoons baking powder
2 tablespoons caster sugar
125 grams butter, cut into cubes
1 egg, lightly whisked
150ml milk
To serve:
250 grams strawberries, hulled and diced
2 teaspoons icing sugar
double cream
icing sugar, extra for dusting
Prepare the strawberries:
Place the diced strawberries into a bowl, sprinkle over with icing sugar. Stir well and set aside.
Make the shortcakes:
In a processor, add the flour, rice flour, baking powder, sugar and butter. Pulse until mixture resembles breadcrumbs.
Whisk the egg with the milk add to the processor and pulse again until the mixture comes together.
Turn out onto a board and knead briefly just until the dough comes together. Press out to form a disc. Wrap in plastic and place in the fridge to rest at least an hour or even overnight.
Roll the dough out until it's 2-3 cms thick (about an inch). Cut into rounds and place these onto baking paper lined trays. Brush the tops with a little milk.
This dough will make about 10, 5cm/2 inch rounds.
Cook in a preheated 160°C/320°F oven for 20-25 minutes or until golden and cooked through. Cool slightly before placing on wire racks.
Assemble the dish:
Slice the shortcakes in half, top with a good dollop of double cream before topping with diced strawberries and a little of the juices that have been released. Dust the tops with icing sugar before placing it on top of the filling. Serve immediately.
Tagged with Sweet Food
Born with a pearl spoon in her mouth, Haalo's future was soon decided..
Wednesday, October 11, 2006
Piadina
It's another reminder that Monday 16th October is World Bread Day and Zorra from Kochtopf is hosting an event to celebrate. I thought I'd make something that comes from my mother's region of Emilia-Romagna in Italy.
Piadina are traditional, unleavened flatbread and in their most basic forms, made only with flour, lard, salt and enough water to form a soft dough. After a short resting period, the dough is rolled out to form rough circles and then cooked upon the testaroli, a special metal grill.
For this version, butter and milk replace the lard and the piadini are dry-fried in a cast-iron ridge pan to give those wonderful ridge marks.
Piadina
[Makes 2]
150 grams plain flour
½ teaspoon baking powder
freshly ground salt
30 grams butter
80ml milk
Place the flour, baking powder, salt and butter in a food processor and pulse until it resembles breadcrumbs. Pour in the milk and pulse again until a dough forms.
Turn this soft dough onto a board and knead briefly until smooth and holds it's shape. Roll into a ball and place in a bowl. Cover and let it rest for half an hour.
Cut the dough into two and roll each portion into an rough oblong.
Heat up a grill or fry-pan and add the piadina. Cook for a few minutes before turning. Press down with a spatula to limit it's rising and continue cooking for another few minutes.
Remove and fold in half - this helps to stop it cracking when cold. While this is cooling, cook the second piadina.
Traditionally, piadina is eaten with prosciutto - folded in half, it's just like a sandwich.
For this piadina, I've used a variety of lettuce, thinly sliced prosciutto, salad onion and camembert. The residual heat in the piadina making it extremely enticing.
Tagged with Bread
Wine Blogging Wednesday #26
Where's Wino? is the theme of this months Wine Blogging Wednesday, hosted by Beau from Basic Juice.
Since the object is to guess the wine we've chosen, they'll be no pretty pictures to help, just a tasting note - which follows:
pale straw in colour
mild blue cheese notes in the nose
apple cider on the palette
low acid, full mouth feel, very refreshing.
Head over to Basic Juice to get a full roundup of the wines tasted and get your thinking hats on!
Tagged with Wine Blogging Wednesday
Labels:
Wine Blogging Wednesday
Born with a pearl spoon in her mouth, Haalo's future was soon decided..
Tuesday, October 10, 2006
Kenyan Chicken Curry
New Curries is one of the latest in the series of Women's Weekly Cookbooks. It certainly seems that there is probably at least one of these cookbooks in every household here in Australia. We've all turned to their pages for reliable recipes that work.
Don't let the length of the ingredient list dissuade you from trying this curry. Once you have the ingredients organised the process is actually pretty simple and the dish is ready in 30 minutes.
My only complaint is in the photograph used to accompany this dish. There's no way that the dish pictured could have been produced by following the recipe. I'm used to that being the case with Donna Hay but it's disappointing to see that the ever reliable AWW has succumbed to styling versus substance.
Kenyan Chicken Curry
[Serves 6]
Marinade:
20 grams grated fresh ginger
3 garlic cloves, crushed
1 teaspoon ground turmeric
¼ cup lemon juice
40ml oil
1 teaspoon ground cumin
3 teaspoons garam masala
1 tablespoon ground coriander
1 teaspoon paprika
1 teaspoon chilli flakes
70 grams yoghurt
1 kg skinless chicken thigh fillets, cut into chunks
Curry:
40ml oil
600 grams brown onions, chopped coarsely
2 teaspoons chilli powder
2 teaspoons ground fenugreek
20 grams grated fresh ginger
3 garlic cloves, crushed
1 teaspoon ground turmeric
2 x 400 grams cans crushed tomatoes
1 cinnamon stick
2 long green chillies, chopped finely
¼ cup lemon juice
300ml cream
1 tablespoon honey
¼ cup fresh coriander, coarsely chopped
Make the marinade:
Place the marinade ingredients into a bowl and stir well to combine. Add the chicken, mix thoroughly to ensure they are well coated. Cover and refrigerate for 30 minutes.
Cook Chicken:
Preheat oven to 240°C.
Place the chicken into a lightly oiled dish and bake, uncovered for 10 minutes.
Make Curry:
Heat the oil in a large pan (a wok works well). Add the onions, chilli powder, fenugreek, ginger, garlic and turmeric. Stir well and cook until the onions soften.
Add the tomatoes, cinnamon stick, green chillies and lemon juice. Simmer, covered for 10 minutes.
Add the cream and honey, stirring well and simmer, uncovered for 5 minutes.
Add the chicken to the curry, simmer until the chicken is cooked, about 5 - 10 minutes.
Remove from the heat before stirring in the fresh coriander.
Serve with plain boiled Jasmine rice.
On a scale of 1 to 10, this curry rates:
Tagged with Curry
Born with a pearl spoon in her mouth, Haalo's future was soon decided..
Saturday, October 07, 2006
Weekend Herb Blogging #53
Ruth from Once Upon A Feast is hosting this edition of Weekend Herb Blogging and since coriander (cilantro) romped it in as the number one herb I thought it only fitting that I made something utilising this most uniquely pungent herb.
It certainly is something that hasn't been love at first taste for me, but with time I've grown to appreciate it's "mouldy" old nose. I am quite taken in the fact that this really is a no waste plant, from it's roots to it's seed, it's all edible and each part offering a different taste.
Now I thought I'd combine the publics favourite herb with my favourite vegetable (perhaps that's a question to ask for WHB #104?) the potato - and in particular the Kipfler Potato (or German Finger Potato).
These mangled fingers of waxy potato are attractively ugly and most importantly, delicious. Their texture holds up well to boiling, presenting a perfect texture and temperament for salads. But it's not a salad that I'll be making, instead they'll be the star of a simple vegetable curry - and I'm using the word curry in the broadest sense, an indication more of it's spice notes.
Potato, Tomato & Pea Curry
500 grams Kipfler potatoes, peeled and sliced in half, lengthways
500 grams tomatoes, seeded and roughly chopped
150 grams peas, fresh or frozen
1 large red onion, finely sliced
1 long red chilli, seeded and finely chopped (use more or less to taste)
1 teaspoon cumin seeds
1 teaspoon ground coriander
1 teaspoon turmeric
1 teaspoon madras curry powder
fresh coriander leaves, to serve
A lidded wok would be best for this recipe - or any deep-sided lidded fry-pan.
Add a tablespoon of oil into a wok and heat gently - add in the cumin seeds and toss until fragrant. Add a little more oil along with the onions and sauté over a medium-low heat until they soften and begin to colour - about 10-15 minutes.
Add the chilli, ground coriander, turmeric and curry powder, mix well and cook for another 2 minutes or until the aromas have release.
Add the potatoes and tomatoes, stir to ensure an even mix before covering with a lid - simmer for 20-30 minutes or until potatoes are tender. Be careful that this doesn't stick, add a little water if you think the mixture is too dry. Check every 5 minutes and toss well to ensure even cooking.
Now add the peas and cook until they are just tender - this should be less than 5 minutes.
Remove from the heat and toss through a handful of fresh coriander leaves and place this into a serving dish. Top with extra coriander leaves.
You could eat this alone or to accompany a simple grilled meat dish.
Tagged with Weekend Herb Blogging : WHB
Labels:
Weekend Herb Blogging
Born with a pearl spoon in her mouth, Haalo's future was soon decided..
Friday, October 06, 2006
Cheese: Mungalli Creek
Mungalli Creek is a bio-dynamic dairy located in far north Queensland and they produce a range of products that include milk, yoghurt, cheese and dips. The cheese I'm looking at today is one that is very well known to Italians - Ricotta!
Cheese Maker: Mungalli Creek
Cheese Name: Ricotta
Location: Brooks Road, Millaa Millaa
Mungalli Creek has a tasting and tea room called Out of the Whey and it's open daily from 10am-4pm.
The dairy uses bio-dynamic practice as developed by Dr Rudolph Steiner in the 1920's. While they don't use artificial chemicals or fertilisers they do use something called Preparation 500. This is basically manure packed into corn horns and buried over winter. The manure converts into colloidal humus and is said to help develop soil structure and encourage worms and other soil micro-organisms. With healthy soil you get healthy feed and in turn healthy cows.
I often used Ricotta in recipes on this blog and have always stressed the important of avoiding those bland supermarket tubs of substances that bear no real resemblance to ricotta. While I am a supporter of the basket pressed delicatessen versions, this type of ricotta is something I use when I just want to enjoy the cheese as it is. I think is as close as you can get to ricotta you've made yourself.
It's gorgeously dense and the colour of double cream - you can't help but spread it thickly on some toasted bread - which is exactly what I did, using the Seeded Orange Soda Bread.
Thickly sliced and grilled until golden, a thick layer of creamy ricotta and for sweetness, a generous drizzle of honey. A slightly decadent way to start the day.
Tagged with Cheese
Subscribe to:
Posts feed
©
Cook (almost) Anything at Least Once
| All rights reserved.